Improved Precision Measurement2016-06-13
Regarding quality inspection, we mostly use vernier scale and micrometer for measuring the dimensions of precision manufacturing CNC parts. As per our policy of IPQC, we are able to read the measurements much by using vernier scale and micrometer.
What kinds of parts can we use Vernier scale and micrometer to measure?
The answer is "it depends". Both Vernier scale and micrometer have their own limits. For example, Vernier scale and micrometer cannot measure CNC machined complex profile or tiny hollow workpiece with thin wall. For CNC machined part with complex profile, we will recommend to use a coordinate measuring machine (CMM). A CMM can read dimensions in up to six degrees of freedom and its accuracy is down to 0.001 mm. After that, it displays those measurement readings in the mathematical form. You can convert the readings into profiling for reverse engineering purpose.
How to measure tiny and hollow CNC precision parts by micrometer?
To measure a tiny and hollow workpiece by hand tool such as Vernier scale or micrometer is likely to cause deformation of the items but we will be not able to get correct dimensions.
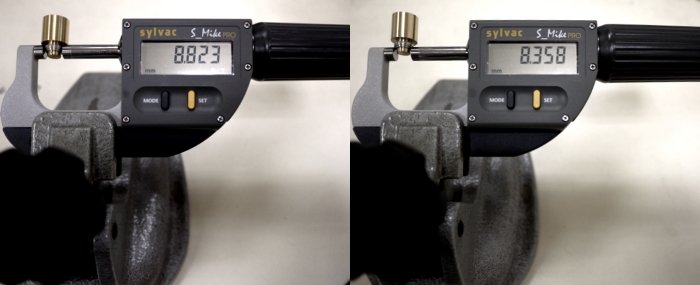
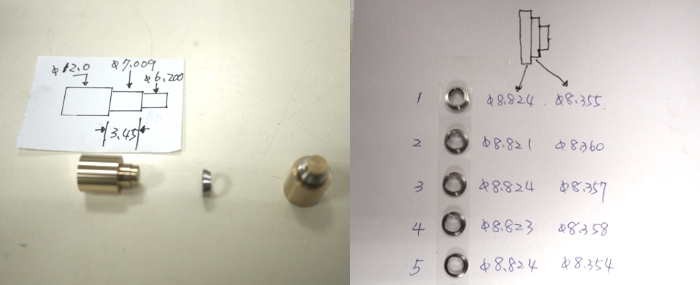
Therefore, to avoid from incorrect readings, we suggest insert a solid mating part inside the tiny and hollow CNC precision part. See below photos show a tiny hollow CNC precision manufacturing dental component. To measure the part, we used a Sylvac S_Mike PRO micrometer made in Swiss with a φ6.5mm measuring anvil. Also, we used a brass CNC turned part machined for transition fitting with workpieces to prevent the part from deformation.

Improved Precision Measurement

The Precision Measurement Readings
Any other way to measure your parts directly and accurately?
Generally speaking, a hand micrometer with measuring anvil of φ6.5 mm is with a measuring force between 5-10N. However, the measuring force 5-10N is large enough to cause deformation of tiny and hollow CNC precision machined parts.
Here is the problem: how to measure tiny and hollow CNC precision parts? An alternative choice is to use a bench table with φ2mm measuring anvil . Smaller measuring anvil is usually with a measuring force between 0.2-1.0N. It is good to measure CNC parts diameter with tolerance less than 5 microns.
Should you have any questions about quality inspection, kindly send us email without hesitation.
