Addressing Thread Burr Issues in External Thread Production2024-12-30
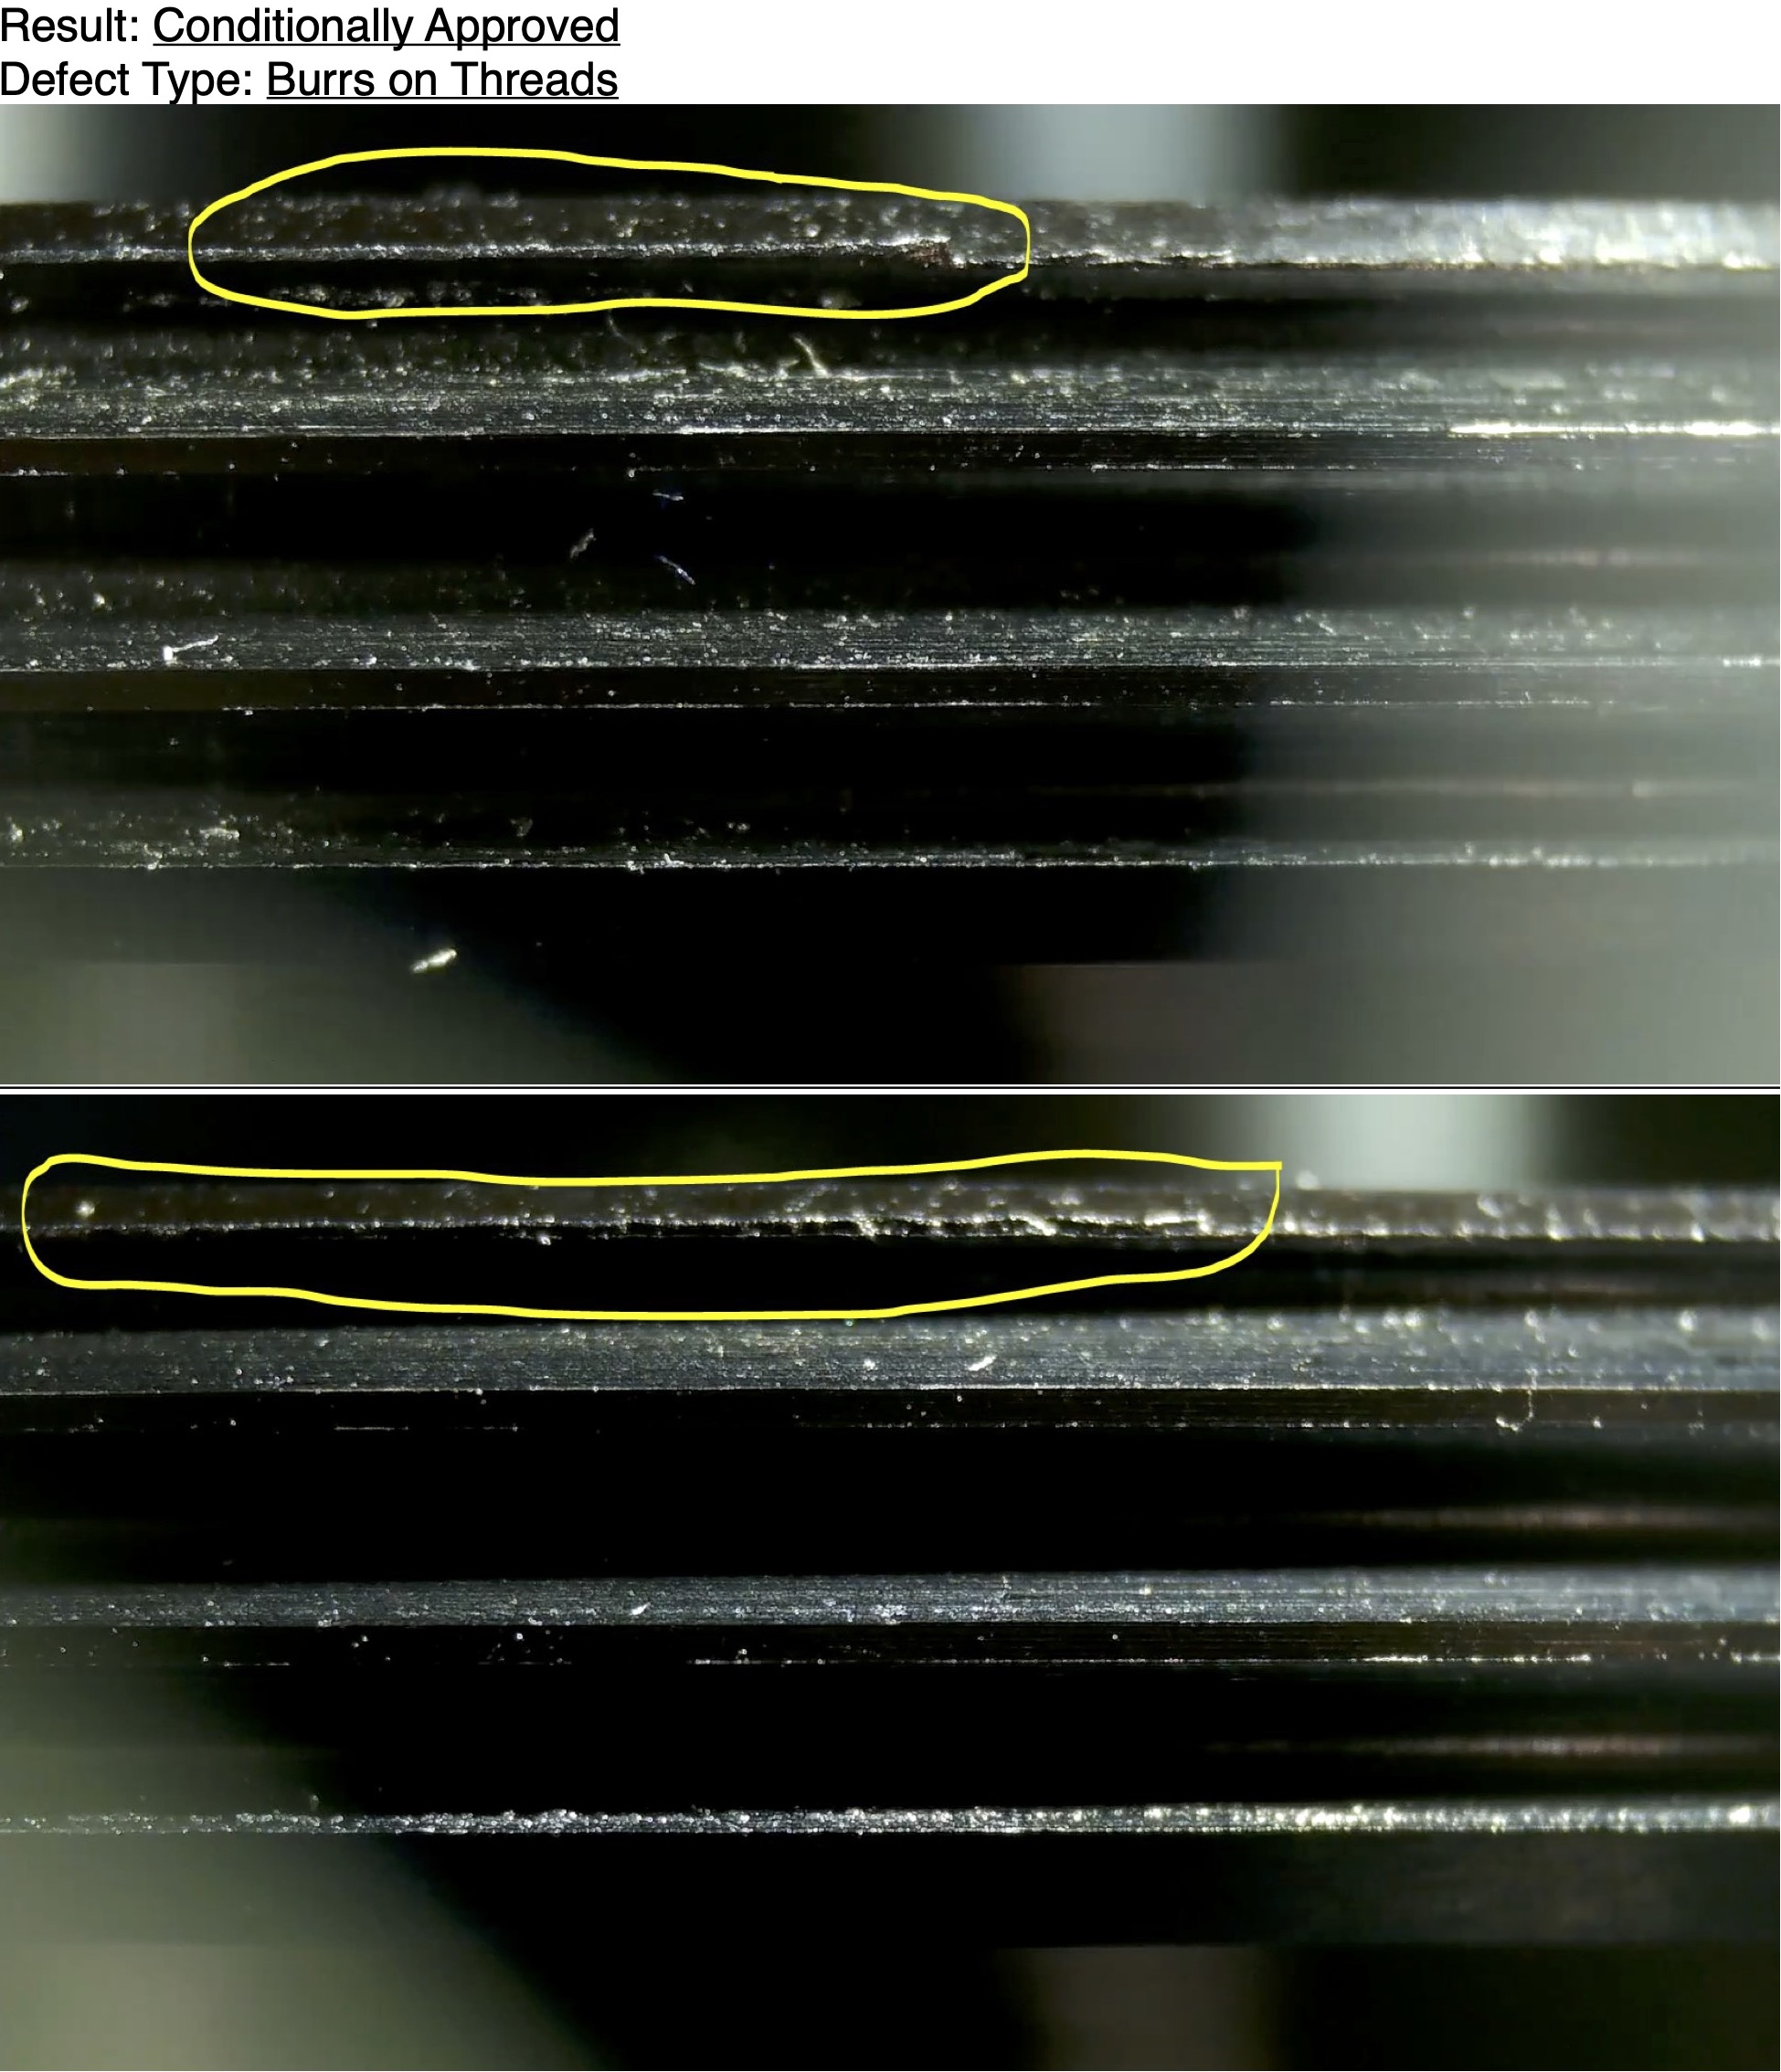
A customer raised a significant concern regarding external threads on a CNC machined part specified as 3 7/8-16 UN-2A, pinpointing the presence of burrs along the threads, as evidenced by the attached images. Although the part passed the ring gauge test, which focuses on thread dimensions and form, it failed to address the critical surface finish issue of burrs.

Burrs are present along threads
Root Cause Analysis
Initially, the engineering team tried to machine the chamfer as per the drawing specified C0.889 x 45 degrees, but this left only about 2 effective thread turns due to the part's thickness being only 5.207 mm, raising concerns about strength. The calculation for this is as follows:
Effective Thread Turns = (5.207−0.889×2) / (25.4/16) = 2.16
To increase the number of effective threads, the engineering team reduced the chamfer size to around C0.5 x 45 degrees, which unfortunately made the thread flanks at both ends too thin, leading to easy burr formation or deformation.
Solution Implemented
After a discussion with the customer, our decision was made to machine the chamfer size to C0.889 x 45 degrees on both thread ends, following the drawing specifications, to avoid deformation and burring due to the thin thread flanks. This adjustment might reduce the effective thread to about 2 turns or even less, but given that the thread does not need to bear heavy loads, the customer agreed to this critical compromise, getting rid of burrs over the thread. Additionally, they suggested a full inspection of the external thread quality, with the option to use a scraper or file to remove any burrs if necessary. This case study also taught the team that thorough and proper communication beforehand is far better than reviewing the causes and implementing improvements after an issue has occurred.
